
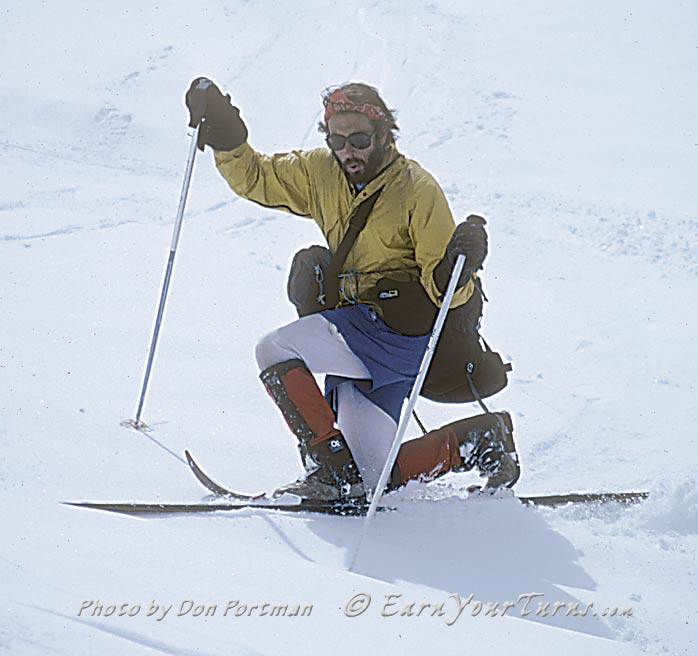
A hard turn is good to find.
Photo by Halsted Morris.
There’s a really good chance you’ll think of my advice on picking gear for telemarking as just another died in the wool leatherneck recommending old-fashioned values just because that’s the way he did it. You’d be right, except that everyone I’ve ever seen who could tele well, all of ’em, had to go through the school of hard knocks to figure out the nuances involved in making a sweet telemark turn look ridiculously easy and sexy.
In other words, don’t take my word for it, ask around and you’ll see, the hard way is the best way. Besides, let’s face some facts my friend. You’re not interested in telemarking because it’s easy; anybody who has seen it done knows it’s not easy. And while you might nod your head in agreement now, trust me, if you do take the hard road to learning how to tele you’ll know you did because you’ll question that you ever agreed with me that it could possibly be worth the amount of flailing involved to figure it out. To which I can only reply, same as ever, it is worth it.
That is, of course, trusting and assuming you persevere and figure it out. If you don’t, well, there’s always AT which stands for Already Tele’d, or Abandoned Tele for those who can’t. 😉
Learning to Tele Basics
The ultimate curmudgeon of tele on classic equipment.
Boots
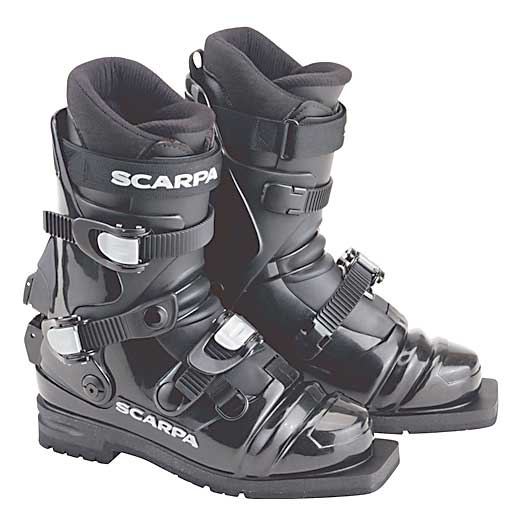
A classic, The first 3-buckle T1 which became the T2X when T1 added a 4th buckle.
It bears mentioning that even if you get a steal of a deal on a used pair, don’t scrimp on making sure the boots fit you well. If you need to, spend a few Franklin’s to get the boots properly fitted. That may seem like a lot, but it is a universal observation that you will feel better and ski better if your boots fit better. This is even more critical with telemark boots since you will be flexing them, so they need to feel comfortable standing up, or squatting low, and all points in between.
Here’s another thing you need to know about telemark. It isn’t all about the turn. Part of the appeal is the simple pleasure of wearing a boot that is comfortable in a way that a rigid-soled alpine boot never ever can be. So make sure to you take advantage of the walking comfort factor and get your boots fitted to your feet.
Duckbill or Duckbutt?
Although there are two different norms, you’re more likely to find a pair of 75mm boots with a duckbill, also known as the Nordic Norm. These boots are arguably superior for learning than the New Telemark Norm which is characterized by a boot with a bellows for flexing, but without the protruding duckbill. Instead, these boots have an alpine shape at the toe, making them compatible with plate style AT bindings, and for the purpose of telemarking, a second heel — a small shelf attached to the sole behind the bellows, around the middle of the boot, that an NTN binding uses to hook onto the boot.
I don’t want to dissuade you from buying an NTN boot and binding combination, but you will end up missing out on some of the humility available when learning to telemark. This may be a good thing, but as I indicated earlier, those moments of being schooled with and by poor technique, in part due to inferior equipment, impart a deeper sense of balance that needs to become second nature for telemark to be pleasureable. Thus, you can shortcut some things with superior gear, but developing deep roots in tele demands the trials and tribulations of floundering on the floor of shame. And trust me on this, if you don’t have deep roots in tele you’re just postponing the inevitable switch to the dark side of free heel freedom where you exchange a free mind and free heels for lighter weight 2-pin tech gear and the mental security of acceptance by the herd.
Bindings
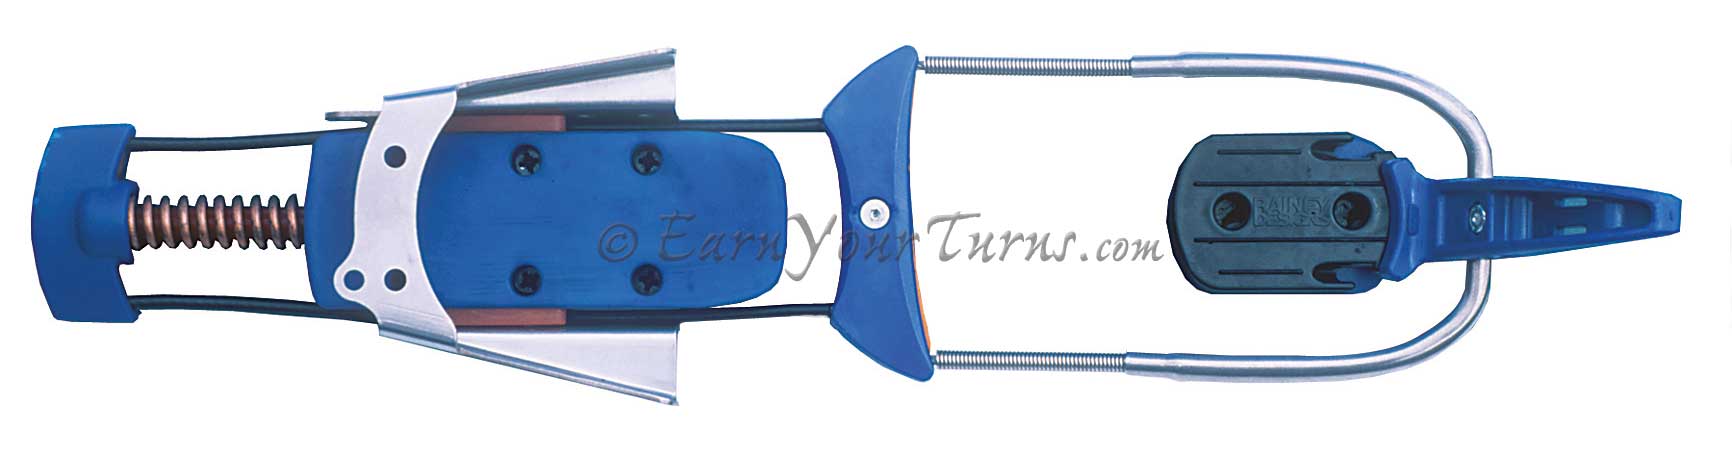
G3’s Targa – the most popular telemark binding evah!
For plastic telemark boots, be sure to get a cable binding. Cable bindings use spring tension applied to the heel of your boot which creates a force to balance against when weighting your rear ski. Cable bindings from the 90s such as G3’s Targa, Rottefella’s Cobra, or Voile’s Hardwire would all be good models to consider. You could also be a pin-headed Puritan and get a pair of 3-pin bindings, but those were intended for use with leather boots. Unless you’re going full retro, wool knickers included, stick to plastic and cables.
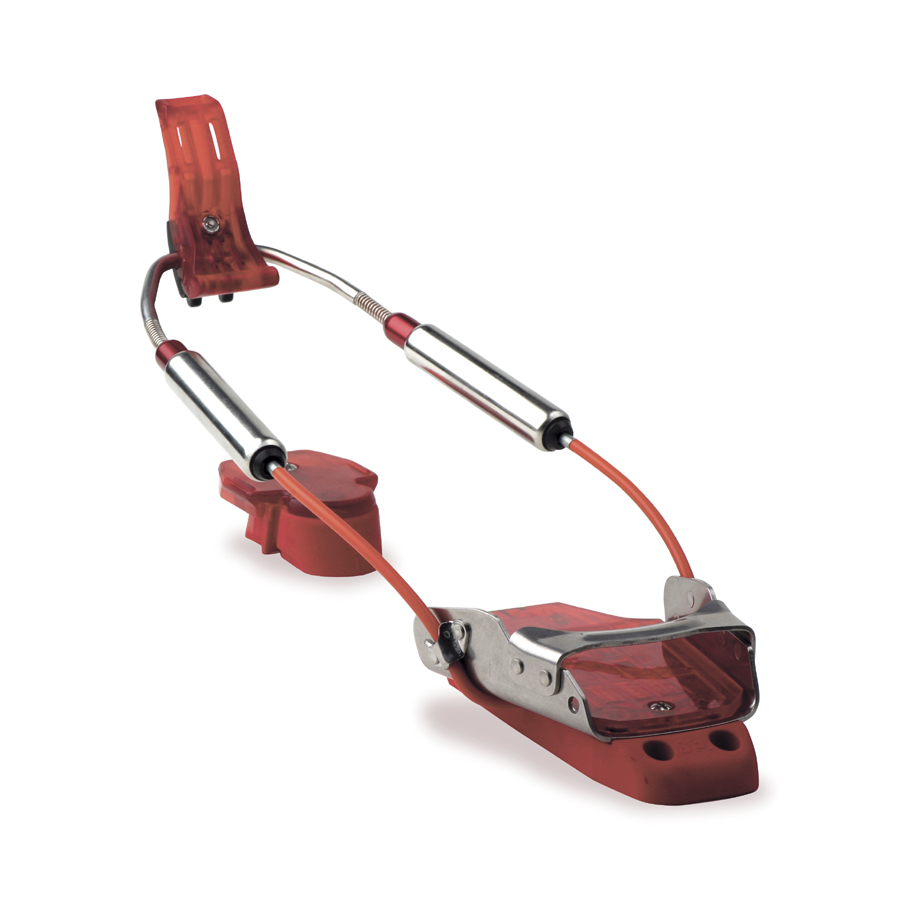
The first generation HH, same as the last except for color.
Backcountry Bindings
If you know you’re going to want to go in the backcountry, then you should seriously consider getting a telemark touring binding with the ability to switch from a free heel with resistance for turning, to a free pivoting toe with zero resistance for earning your turns. In that case, there are still plenty to chose from on the used market, but three deserve putting at the top of your list.

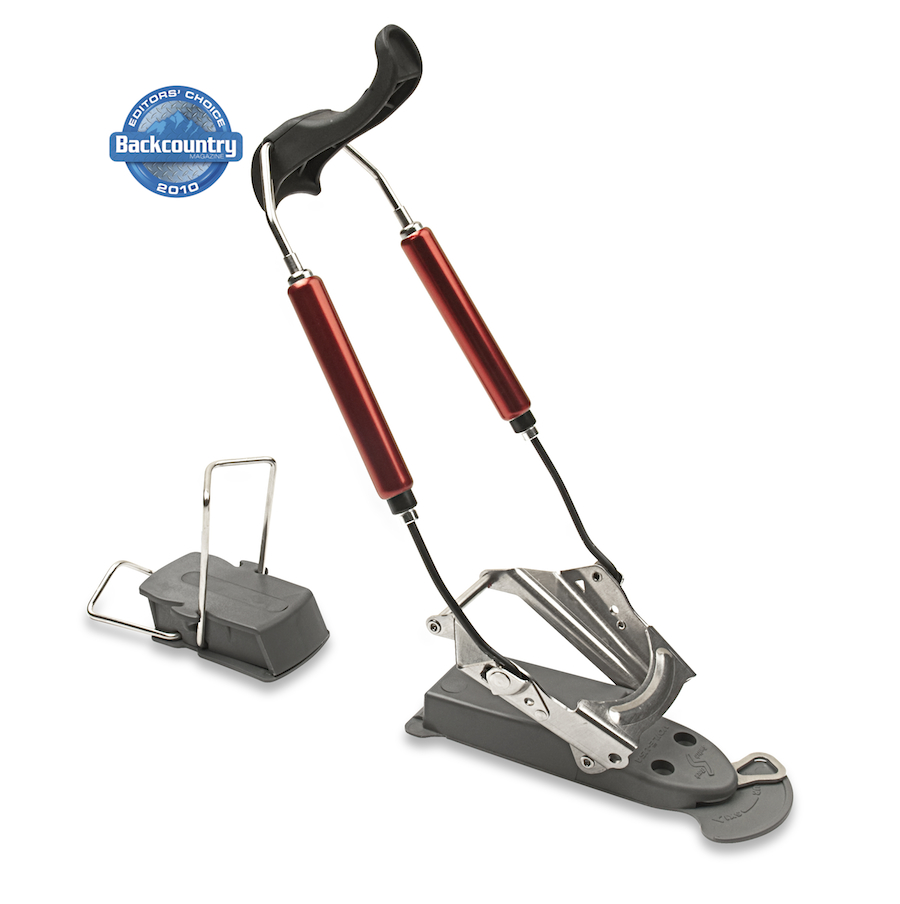
Axl – 4 lbs. of pure power with a free-pivot.
Switchback is a great binding.
The third would be Black Diamond’s O1. This was the first free-pivoting telemark binding that had downhill power on par with HH#3. Some might argue it was less, but those would be the grey-haired tele nerds splitting hairs on binding activity levels; a colossal waste of time. It’s a solid binding with a mode switch to flip between a free pivot and a locked toe just by pressing down with a ski pole.
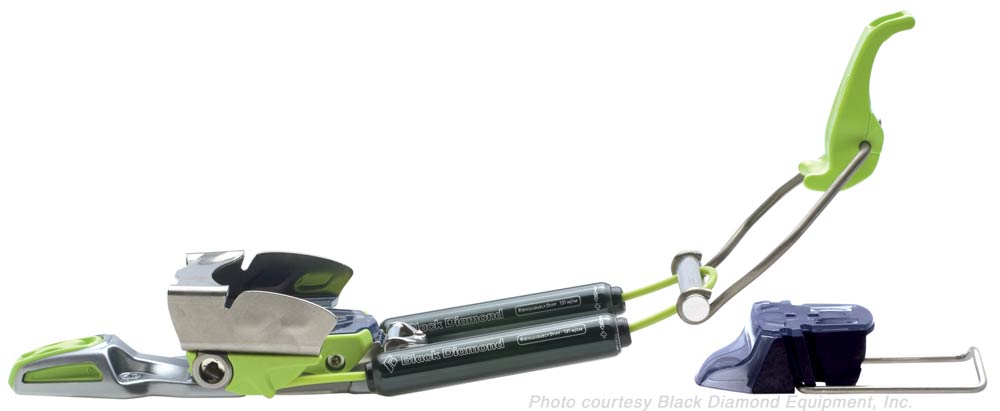
Black Diamond’s O1
Skis
If you’re learning then you want to make sure you have an older pair of skinny skis, but no need to go narrower than 80mm at the waist, 76mm if you chance upon a pair of Mountain Noodles, the original fat backcountry ski. Dull edges will make you work harder to hold an edge, but you won’t be ridiculed for getting them tuned and sharpened either.
If you are going semi-new with your gear and getting a tele binding with a free-pivot tour mode, then you might as well get a new pair of skis, or least some that are approximately 90mm at the waist. This is wide enough to give decent flotation in soft snow, but not so wide that you’ll have a hard time holding an edge with a free heel. Well, not any harder than it already is. Until you actually know how to really weight the rear ski in a tele turn, getting skis fatter than 100mm at the waist will hinder your development. Besides, one of the reasons you should be telemarking is because you prefer deep snow. With tele, it’s always knee deep, and it’s easier to make it even deeper by keeping the width of your skis to less than 100mm at the waist. And yes, of course that makes it harder to tele. Tele isn’t about easy, so stop whining about how hard it is and repeat after me, a hard turn is good to find.
© 2015
Related Posts
Telemark Binding Selection Guide
Boot Fitting Tips
Telemark Boot Reviews