Imitation is the sincerest form of flattery. Bravo Tecnica.
The best incarnation of this is the power strap on K2’s Pinnacle 130. If you’re going to get picky about convenience, this power strap allows you to set the tension, and leave it. When you want to get out of the boot, even then you can leave the velcro strap locked in position, just detach the buckle to open the top of the cuff.
Parts and Tools
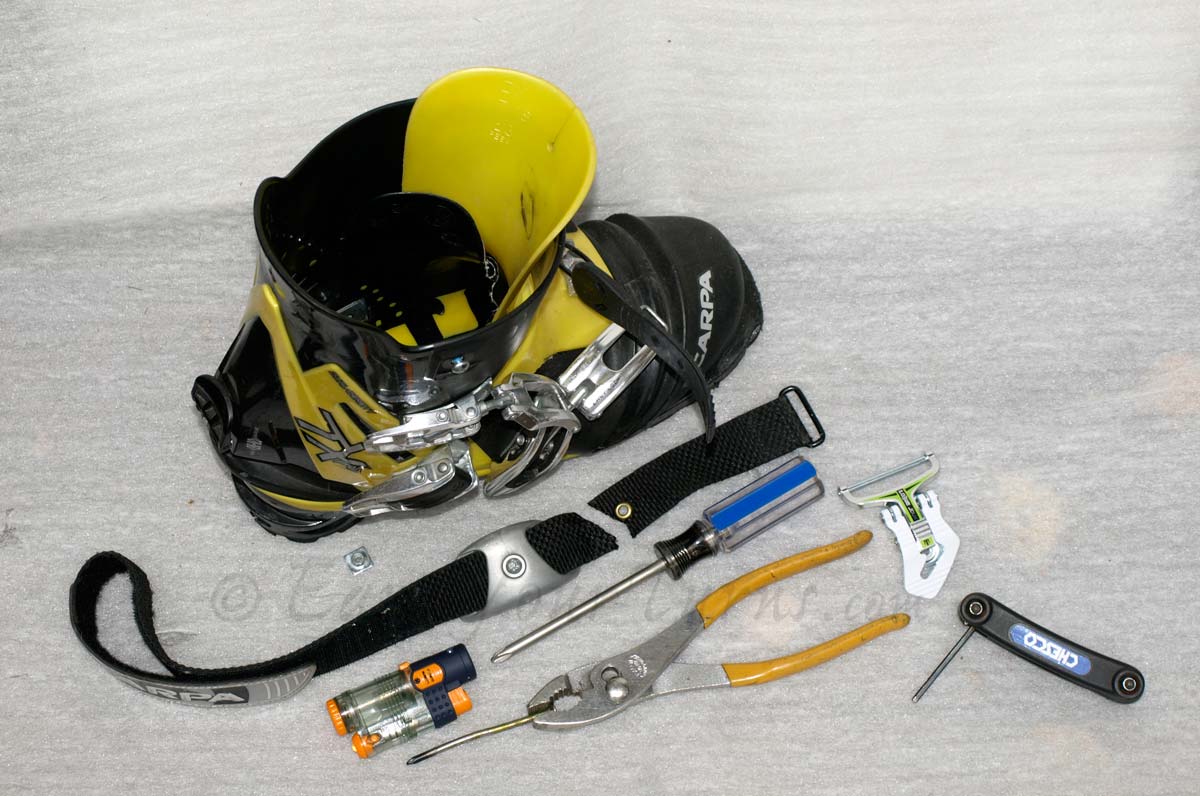
Tools: Pliers, hex keys, butane lighter,
#2 Philips screwdriver, knife.
Parts: T-nuts and bolts, power strap,
Tecnica Cochise Pro pwr strap buckle
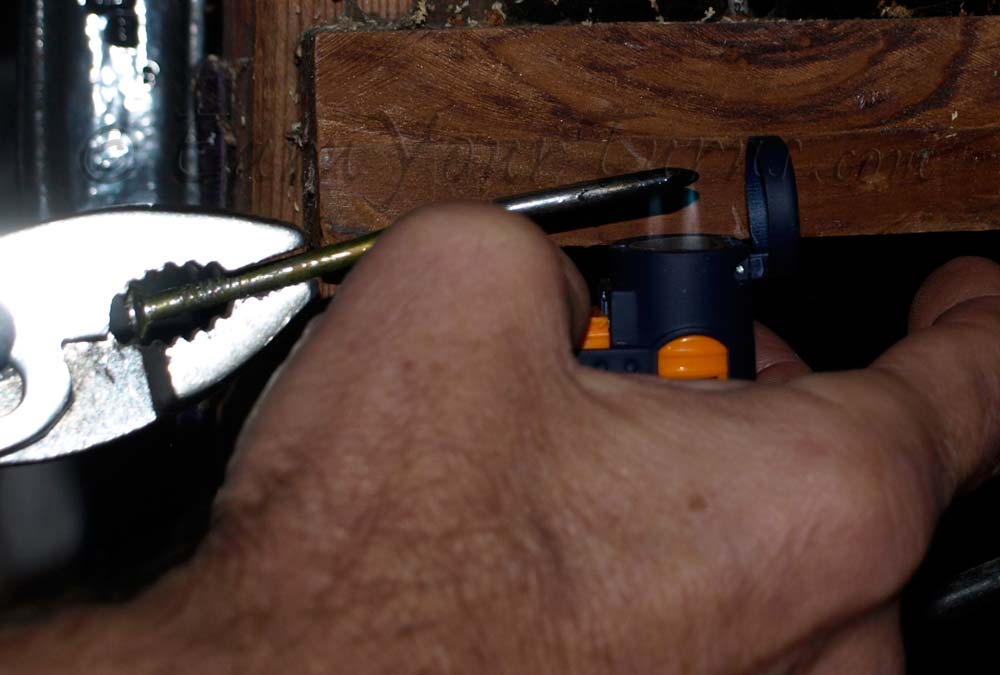
Use a hot poker to sear a new hole for securing the power strap to the spine of the cuff.
Many power straps are secured along the Achilles spine of the cuff with a single rivet or T-nut, and they may or may not have the hole through the webbing reinforced with a grommet. That could be a wise move, if you have the right diameter and thickness grommets available. If you don’t, it is good enough to simply sear a hole in the webbing with a hot poker, either an awl or a nail. A butane torch will get the poker good and hot, but I just used a small, hand-held butane lighter and it did the trick in about 10 seconds of enveloping the tip of a nail in blue flame.
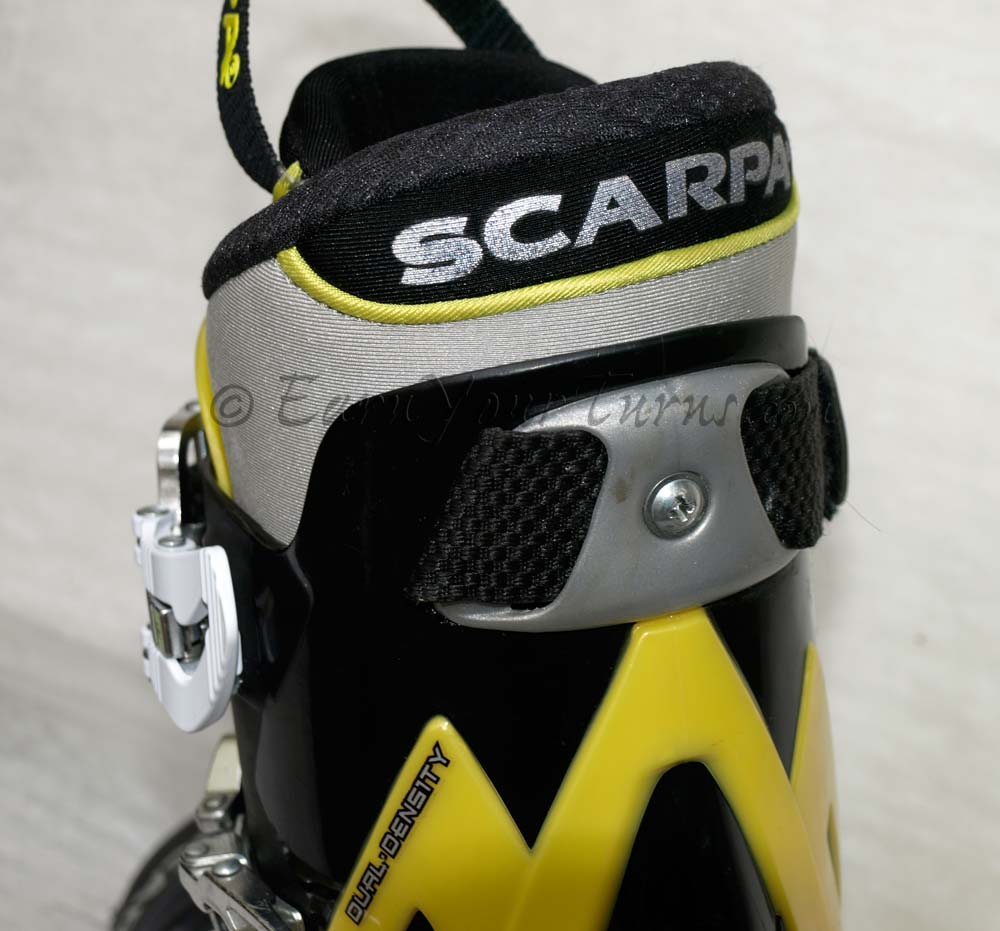
The loop of the original power strap was cut off, leaving enough tail to loop back on itself.
If your boot has a part riveted in place, you’ll want an orbital grinding head on a Dremmel to grind off one side of the rivet. It can typically be replaced with a T-nut. For this purpose, I used a 5mm deep T-nut with a 4mm X 0.7 pitch threaded nut using a 3mm hex head. With luck, you can use this same size for attaching the buckle to your boot on the side. For me, this was the easiest part of the operation.
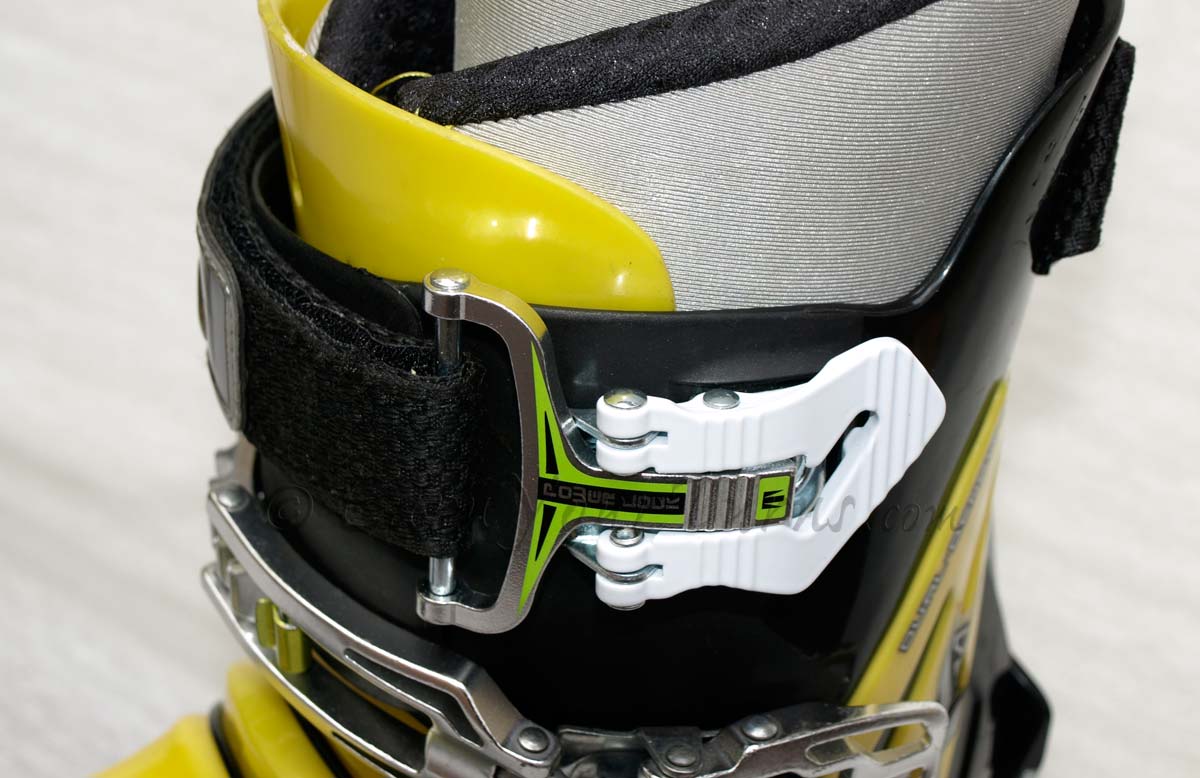
Installing the buckle is easy IFF you swap out an existing buckle. Simply remove the top buckle and associated ladder, then replace the existing buckle with (Tecnica’s Bullrider Power Lock, #40366300003, Bullrider Power Lock). I was lucky; the installed buckle used a T-nut, not a rivet, so I just unbolted it and substituted the Cochise buckle. If you have rivets, grind the head or tail off using a Dremmel.
If you have a four-buckle boot and insist on keeping all four, but changing the power strap only you will have to get more creative and be lucky enough to have enough plastic above the top buckle to attach another one. It may end up being closer to the spine of the cuff than the side. Figure out where you want the buckle, mark the holes, check ‘er twice, then drill and insert a T-nut. Provided you have the tools, the Power Lock buckle comes with rivets you could use if you prefer.
Implementation
This is a temporary adaption of a buckled power strap to a Scarpa TX-Pro, circa 2008. The more I use this boot the less impressed I am with the original positioning of the buckles. They improved in 2010, but telemark boot development is stagnant industry wide. The most important ingredient missing, one that is easily available — theoretically — is larger cuff ROM. For greater backward range of motion the latch mechanism needs to adopt some of the technology used in Alpine Touring boots. For the average DIYer, that’s beyond the typical tool set. However, adding a buckle to the power strap is easy, doesn’t take a lot of special tools, and will yield noticeable improvements to your transition speed and convenience.
© 2013